How to change the default application in macOS. In macOS each file type is opened automatically by a default application. This post will explain how you can change the default application a file opens with.
Double click on a file to open it with its associated default application.
To specify an application
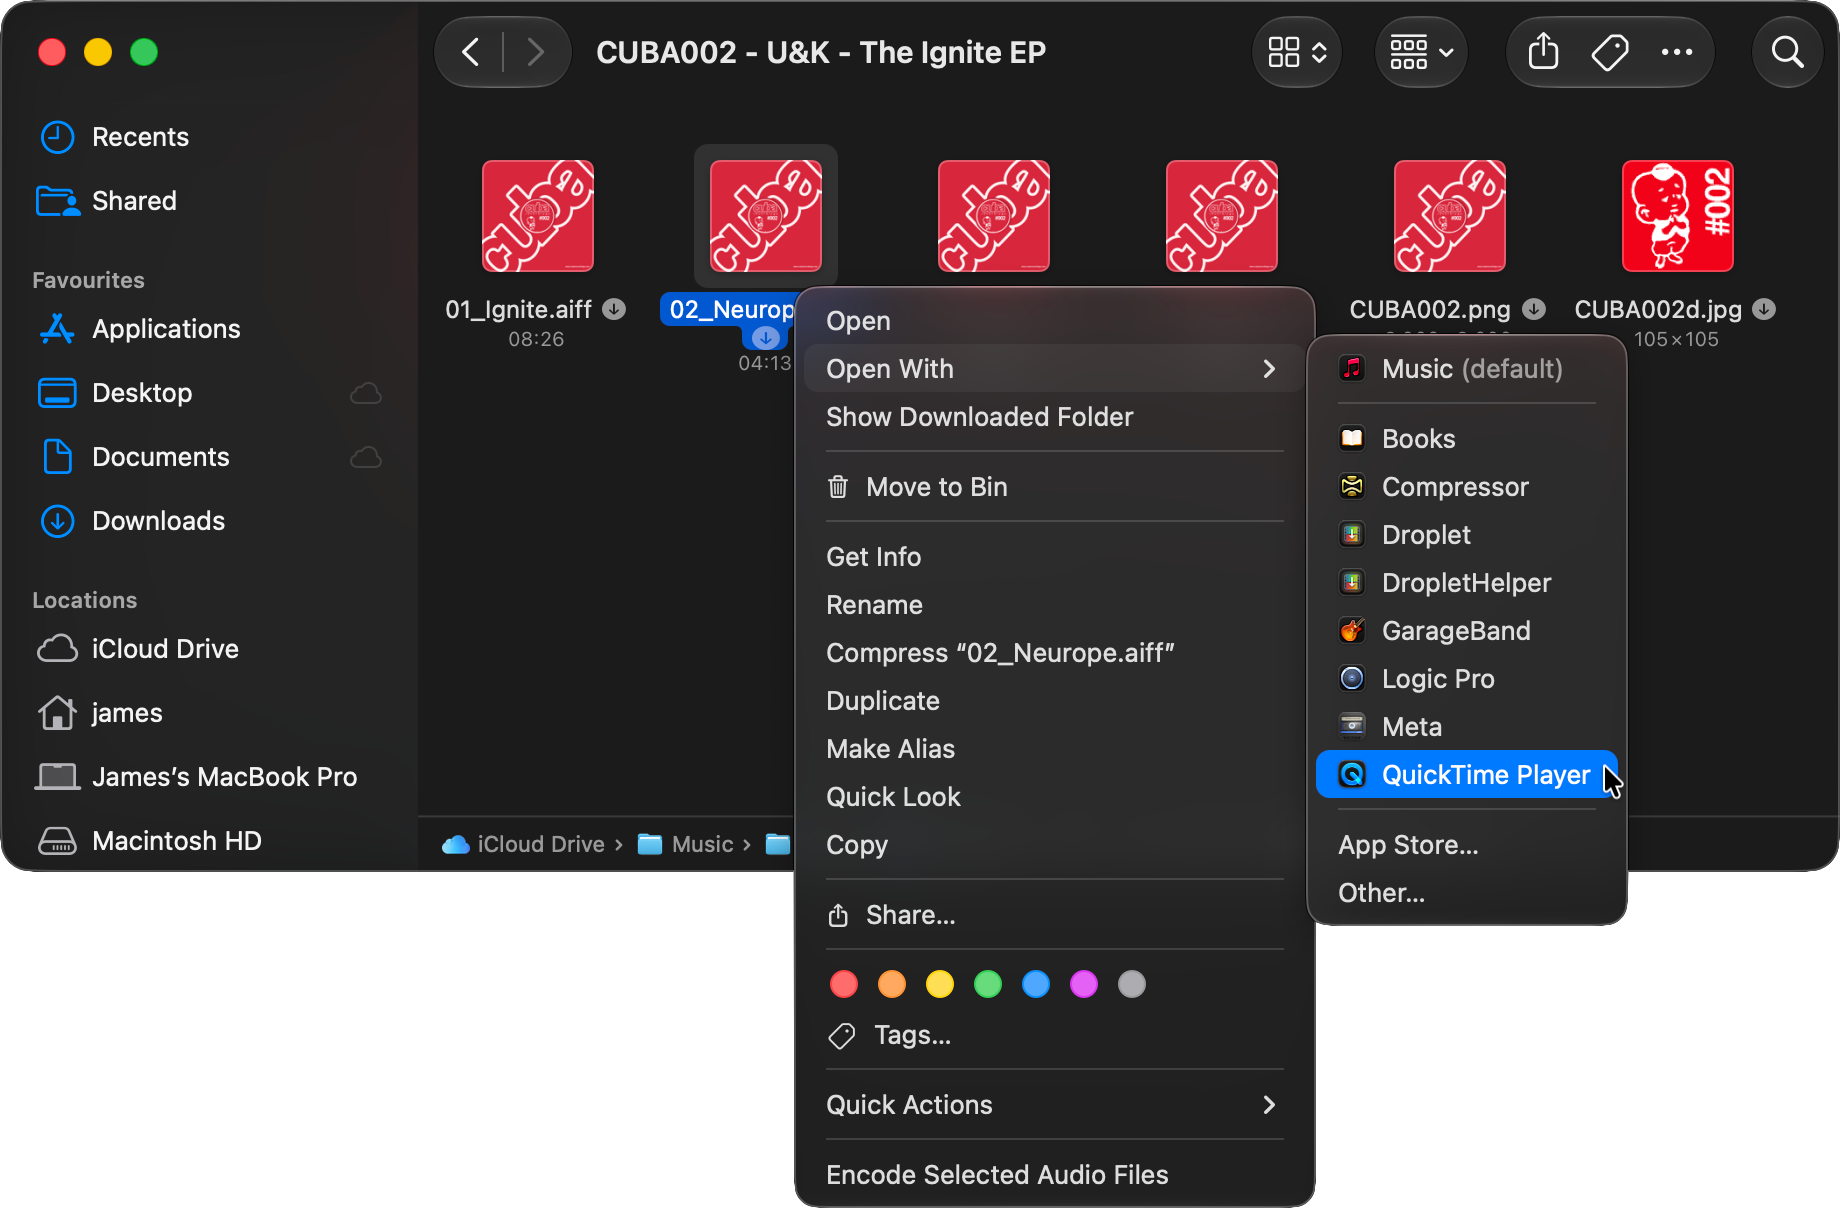
Locate the file that you want to open and right-click on the file (or control+left-click if you have not enabled secondary click in System Settings > Mouse or Trackpad).
Click on Open With to view a list of applications that can open the file. The default application at the top of the list is the application that macOS launches whenever you double-click on that file type.
Click on an application from the list to open the file with that program.
The Open With option from the menu.
To change the default application
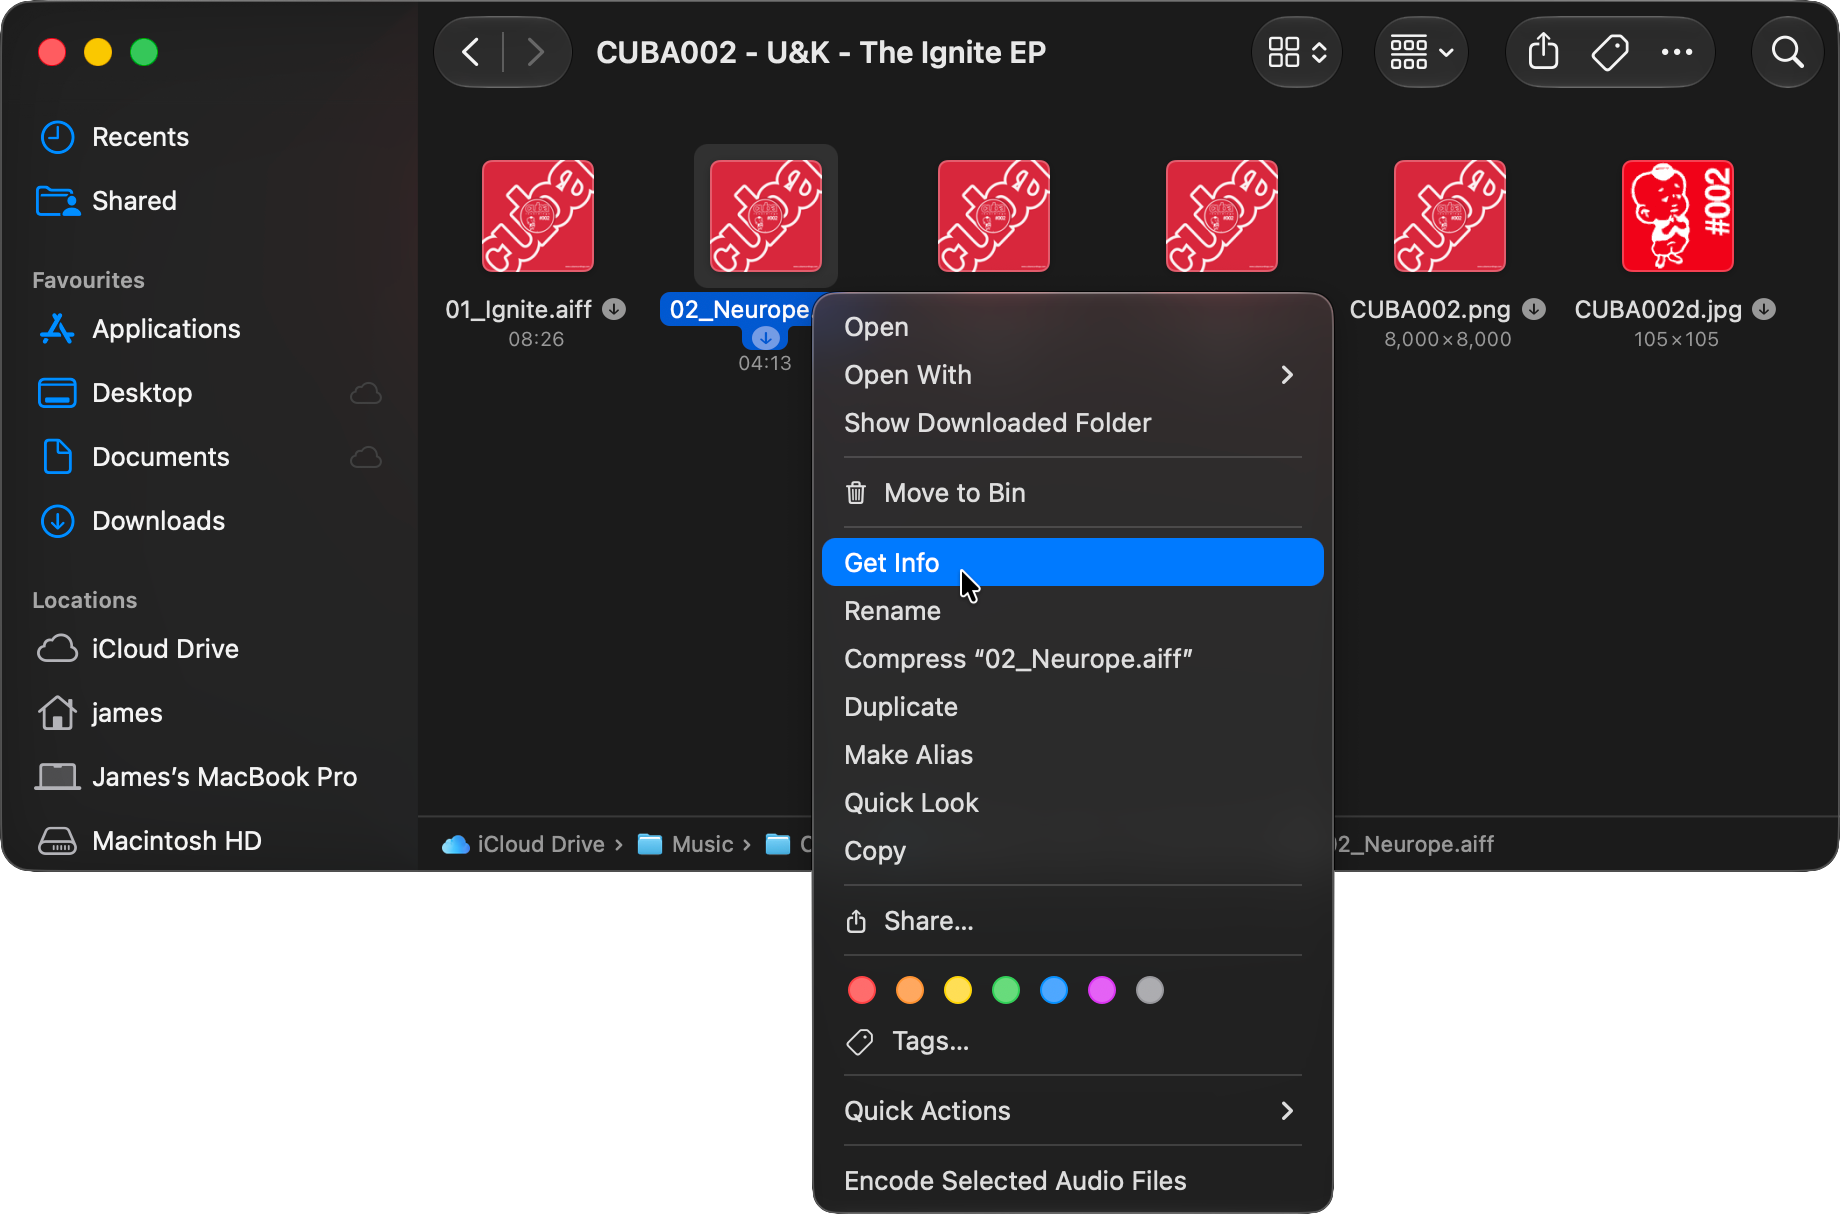
Locate the file that you want to open and right-click on the file (or control+left-click if you have not enabled secondary click in System Settings > Mouse or Trackpad).
Click on Get Info to open a contextual menu about the file.
The Get Info option from the menu.
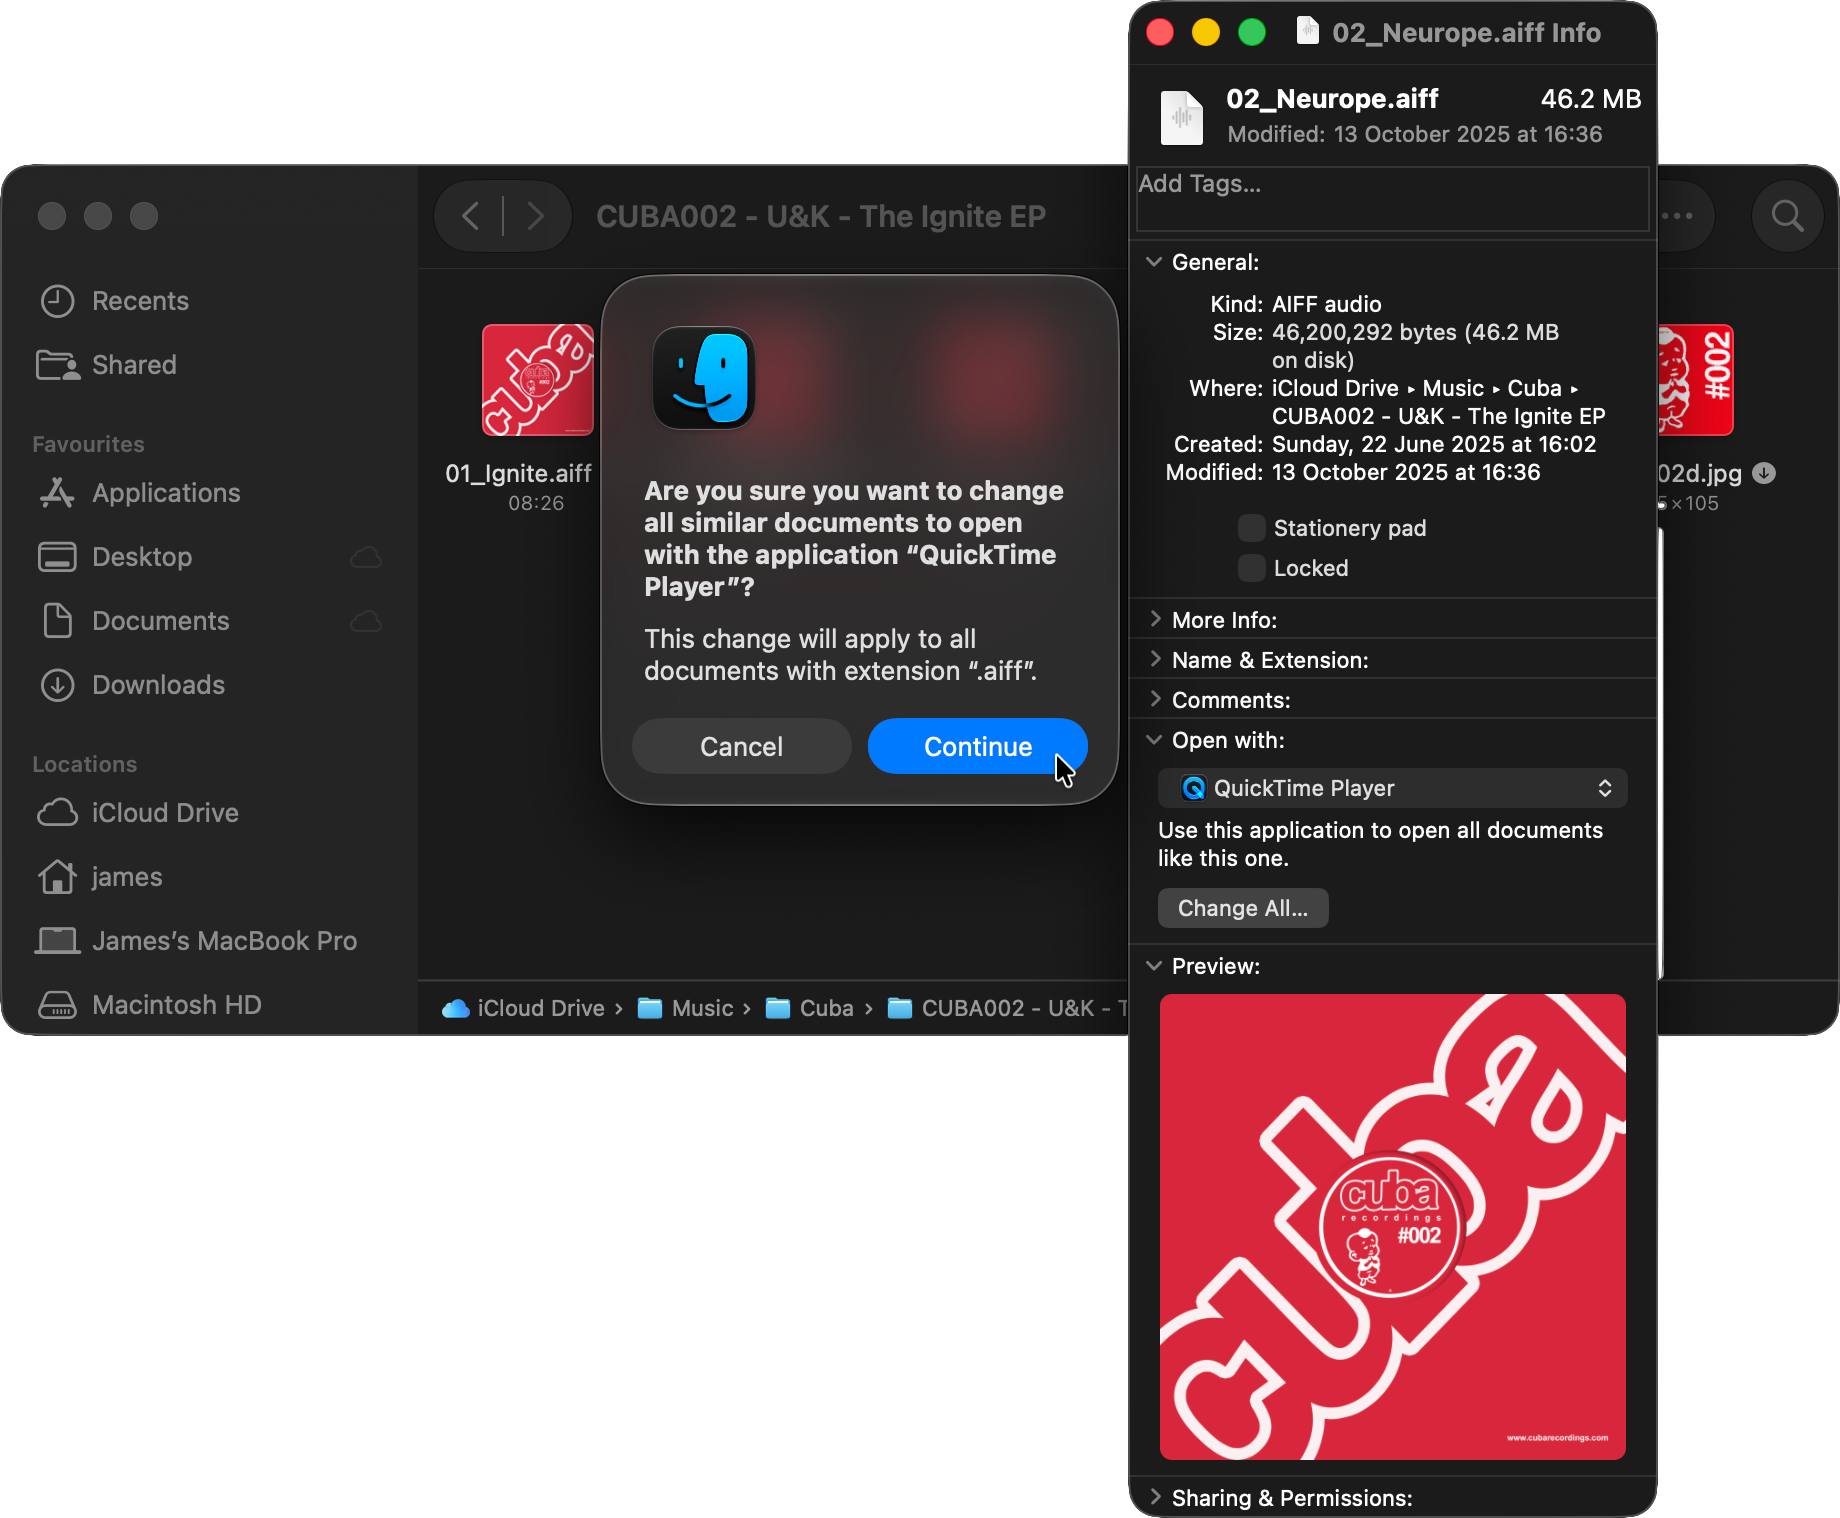
Click on the arrow next to Open with: to expand that section.
You can then choose an application from the dropdown list to select as the new default application associated with all files of that file type. If the application you want is not in the list you can search for it by clicking on the Other… option.
Click on the application you wish to become the new default and then click on the Change All… button. The following message is displayed: ‘Are you sure you want to change all similar documents to open with the application “—-”? This change will apply to all documents with extension “.—-”.’
Click on Continue to change the default application associated with that file type.
A files contextual menu with options to Open with: and Change All…
When you double click on this file type in future it will open in the newly chosen default application.
If you don’t click on Change All… then only that single file will be affected.
Originally posted 6 April, 2025. Updated 20 April, 2026. This works in all versions of macOS and Mac OS X.
How To Manage Your Notifications In HEY Mail. In HEY notifications are kept to a minimum. However, you can get notified of any email that enters the Imbox or of any email you receive from a specific contact, domain or email thread.
Writing a post In HEY World. The HEY email service also includes HEY World: a place for sharing your ideas, and thoughts with the world. We will show you how to write and post using HEY World.
Since iPadOS 13 it has been possible to use a mouse and trackpad natively with the iPad. This can really help to speed up workflows and interactivity with productivity apps in particular. Here we will explain how to connect and configure your devices.


